powerwashing-4

12 safety tips to observe when power washing your walls.

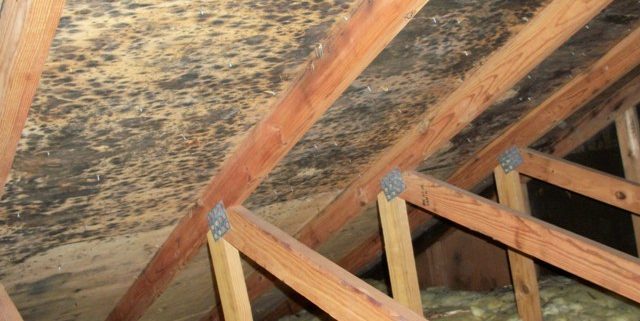
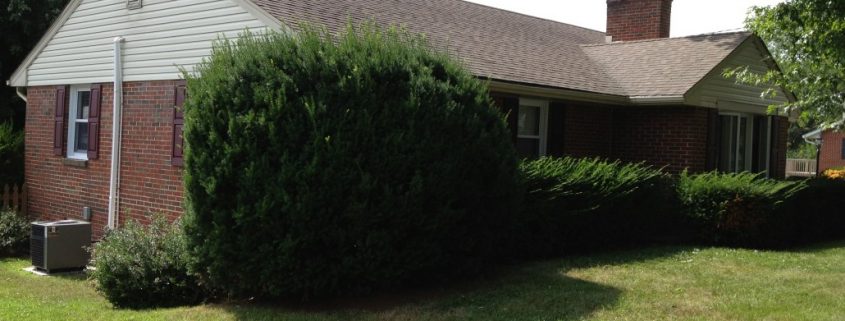
When you are preparing your walls for painting, the first thing you need to do is to remove dirt that may have accumulated on them over the years. This is done by power washing. Failing to remove dirt from walls prior to painting will cause a fresh coat of paint to fail sooner than later.

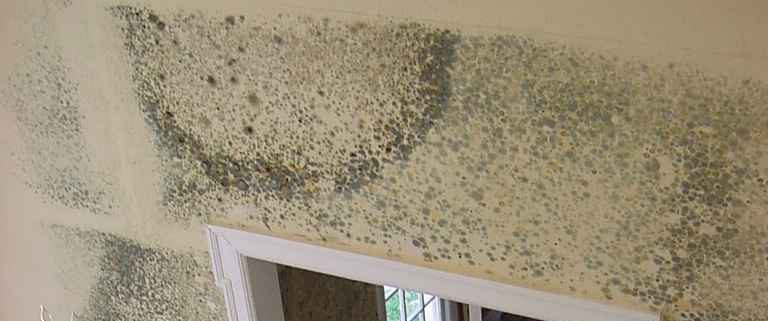
Impurities removed from walls through power washing include dust, mildew, chalk, old paint and mud. Some power washers operate on gas while others operate on electricity. Electric power washers are more preferred since they have the ability to deliver more power.

Safety tips when using a power washer:

  1. Power washing should be done by skilled hands. Even if they are not difficult to operate, leaving them in the hands of an unskilled person can make them dangerous to people and property. The biggest challenge with handling one is in learning to use the right pressure.
  2. Power washers should not be pointed at other people. The pressure expressed by the power washer is extremely high, so just like a gun, you should not aim it at people especially when it’s discharging water.
  3. If you are working on a ladder, angle your ladder such that it will compensate for the ‘kick’ that comes when the water makes contact with a surface.
  4. Power washers should not be used around or near power sources, such as meter boxes, lights and sockets. Turn off the power before you begin and after you finish, check to ensure that no water leaked into any power sources.
  5. Power washers should be used with the right levels of pressure. A psi of between 1500 to 1800 can eliminate spider webs, grit, dust, dirt and fungus. For washing off loose paint, a force of 2500 psi will work. Anything higher and you’ll damage the walls.
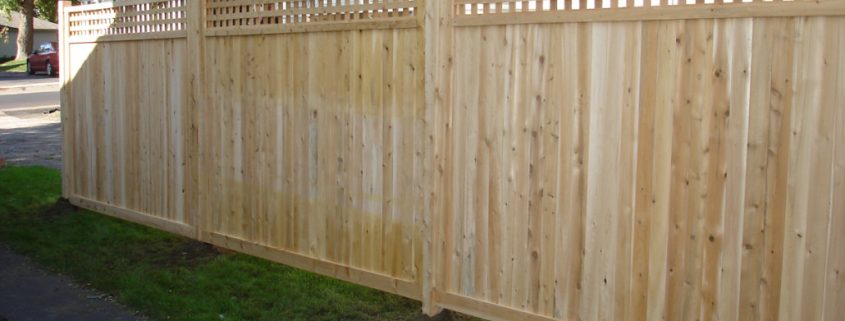
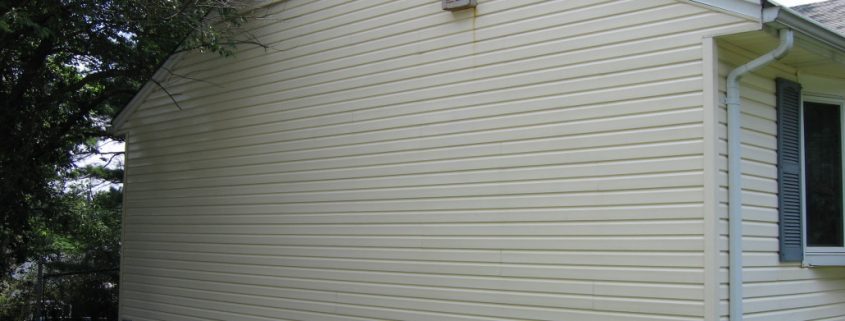
  6. Note that wood sidings are especially vulnerable to power washing and the right level of pressure should be applied when working with wood.
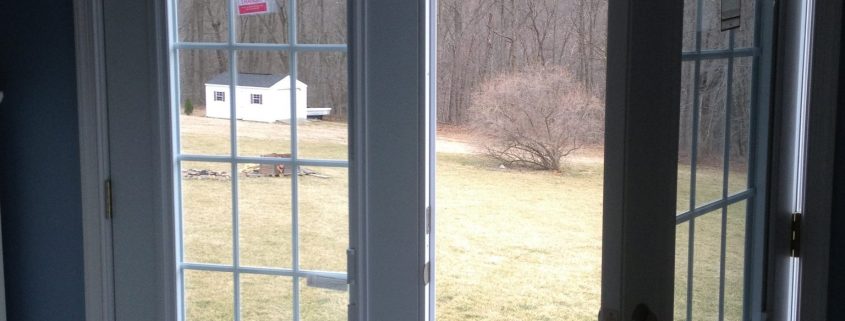
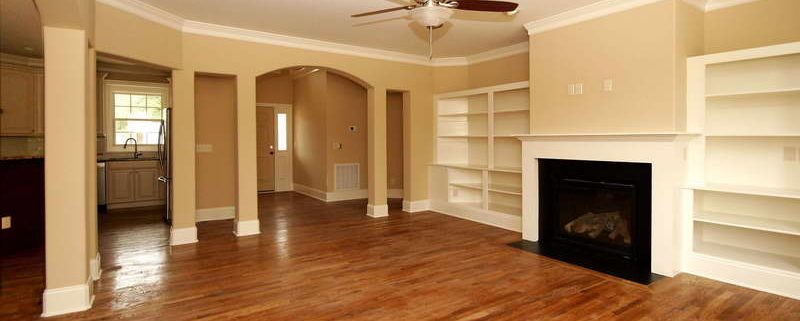
  7. Before power washing, your house should be protected against the pressure blast. All windows and doors should be closed. If any windows and doors are leaky, extra caution should be applied when blasting around them.
  8. Make sure the pipe doesn’t get tangled during power washing. Remove all items that could be in the way, such as furniture or kids’ toys.
  9. Power washing should only be done on still days. If done on a windy day and you are up on a ladder, the combined force from the wind and water pressure could make you fall.
  10. Start power washing from the top of your walls and proceed vertically in a downward direction.
  11. Washing should always start with a low pressure and from a safe distance. Only increase pressure in small amounts and move closer to surfaces in small distances.
  12. A power washer should never be aimed at windows or doors.
windows-and-doors-10

5 Key Features That Keep Your Windows and Doors Energy Efficient

As the cost of living goes up and the world becomes more conscious about environmental conservation, a lot of people have decided to take steps to make their homes more energy efficient. Windows and doors are the main parts of the house that can contribute to energy inefficiency if they don’t shut properly, are too thin, or if they have spaces around them that let in drafts.

For this reason, it’s important to ensure that the windows and doors you choose for your house are built for energy efficiency. Below are 5 key properties that should guide you when making your choice:

  1. Quality of the frames

Window and door frames have always been built for strength and durability. But you also have to check whether they are energy efficient. For instance, aluminium is very strong, but is not energy efficient. To make frames energy efficient, they have to be filled with insulating foam to prevent energy loss. Most energy efficient frames produced today also have the added advantage of being customizable, catering for your personal tastes.

  1. Is the glass Low-E?

‘Low-E’ is a coating that works by reflecting infrared light to retain heat inside the house during the winter and keep heat out during the summer. The coating also reflects UV light, protecting your furniture and décor from fading.

  1. Multiple panes provide more insulation

Energy efficient doors and windows have at least 2 or more panes. As the number of panes increases, so does the strength of the glass and its ability to retain heat. When combined with other features such as Low-E, the glass will surpass energy-star requirements.

  1. Go for gas-filled panes as opposed to air-filled

The panes in energy efficient windows can also be filled with insulating gases to reduce conduction of heat. These gases, such as krypton or argon, are better insulators than air.

  1. Check the quality of spacers

Spacers are made of material such as foam, stainless steel or aluminum and are used for keeping panes well-spaced in order to minimize heat transfer. Good quality spacers should handle the flex that comes with expansion and contraction. If the spacers are not good quality, this movement can be lost, resulting in loss of the seal in the panes.

duct-cleaning-19

6 Tips for Cleaning Ducts and Air Vents

Moisture, dirt and dust found in the air are carried into vents and ducts which can cause mold, and dust contamination over time. If these contaminants are not cleaned out, they might result in health complications in people with allergies and sensitive respiratory systems. Additionally, dirty air vents and ducts will not effectively move air in and out of your heating and cooling systems.

As such, it’s important to clean air vents and ducts every few months. For each cleaning session to be successful, you should follow the below 5 tips:

  1. Check for the presence of mold

If your house has inadequate ventilation, this can cause moisture accumulation resulting in growth of mold. As air travels through ducts that have mold growing in them, it causes mold spores to detach and blow into the house. If the spores are blown into moist areas such as bathrooms, kitchens or basement, large parts of your house to get mold infestation.

Though mold is visible, it might not be easy to see it in areas deep inside the vent. The best way to detect mold presence is through lab analysis. Depending on the extent of infestation, you might either have to clean out the mold or replace the damaged areas.

  1. In case of mold infestation, find out the source of the moisture problem

Even if you clean out the mold and replace moldy areas, the problem will still recur if you don’t address the moisture problem. In addition to cleaning your vents and air ducts, find out what is causing moisture accumulation and fix it. Though this will increase your costs, it’s better compared to the damage you could end up with in the future.

  1. Check for clogging and debris accumulation

If pests such as cockroaches, flies and rodents die inside air ducts and vents, they could cause clogging. As they decompose after they die, you will notice particles releasing into your living areas from the air vents or air ducts. You can also tell you have a clogging problem if air is not circulating as well.

  1. Identify professional air vents and ducts cleaners

To hire qualified professionals, check for valid licenses, a good reputation and lots of experience. This is the only way to guarantee that your air vents and ducts will be cleaned properly, keeping them efficient at heating and cooling.

  1. Get cost estimates

Costs will depend on certain factors such as: how extensive the air ducts or vents are, whether you have mold infestation, the amount of dirt contained in the system, and ease of accessibility. Ensure you understand how the cleaning professionals arrive at their estimates.

  1. Confirm the job has been done right after every cleaning

After cleaning is completed, you should notice a change in the air quality. The air ducts and vents should also appear visibly clean. Additionally, allergic symptoms should start to subside.

mold-remediation-6

7 Questions to Ask When Hiring a Mold Remediation Service

Every home will suffer from mold infestation from time to time, due to the presence of moisture.  Mold is toxic to your health so it’s important to hire professionals for mold remediation. In order to hire the right company, you should be prepared with the right questions to ask.

To improve your chances of hiring the right company, it’s advisable to interview between 3 to 5 companies. This will also improve your chances of getting a more favorable cost estimate. Interviewing can help you gauge the suitability of the company based on their willingness to answer questions and provide information such as references.

With these few tips in mind, the following are some interview questions that will help you to choose the right mold remediation company:

  1. Are you a certified mold remediation professional?

Usually, mold inspectors and remediators need to be certified by some select organizations and health bodies. The remediation company also needs an operating license, which should be issued by local authorities. Ask to see these licenses and certifications.

  1. How long have you been a mold remediator?

Employees who have been carrying out mold remediation for a longer time are more likely to do a better the job, making your home safer.

  1. Do you have any references?

References are important as they will always prepare you for what to expect in terms of work ethic and quality of work. Contact a few prior customers to get their opinion before you decide on the company to hire.

  1. Do you work on ventilation systems?

Mold found in ventilation and air conditioning systems can be breathed in and cause respiratory complications. To ensure your ventilation system is scrubbed free of mold, ensure the professionals you are hiring have performed remediation on air ducts.

  1. What guarantees do I have while working with you?

Conducting home tests after remediation should be part of the process, as this will allow you to gauge how likely the problem recurs. Find out what will happen if you find mold after the remediation is completed.

  1. What are your costs?

Costs will differ from one company to another, but should not be starkly different from what competitors are offering. Some companies will also charge for consultation, while others might not. Find out all these factors and compare the total cost against your budget.

  1. Can you provide documentation for insurance claims?

If you intend to claim payment from your insurer, ensure the remediation service can provide the required documentation. Some insurers also have preferred remediation services that they recommend, so it’s a great idea to check with them before you hire.

tree-services-16

7 Reasons Why Overgrown Trees Near Your House Are a Bad Idea

Trees around the house can be a great thing: they provide shade, serve as wind breakers, add beauty and increase property value. But when overgrown, trees can also pose a threat to you and your house. If you allow your trees to become overgrown, they might cause the following damage:

  1. Old and overgrown branches might fall and injure people and cause damage to electricity & telephone lines, your house, car and other belongings. Not to mention, downed electric lines can result in fatalities and fires.
  2. Broken branches and leaves that find their way onto the roof of your house will clog gutters which could result in water flowing into your roof, walls and basement.
  3. Rodents can invade your roof by walking on tree branches that grow too close to your roof.
  4. You might lose complete use of your patio, deck or balcony, if leaves and tree branches grow over that space.
  5. Constant rubbing of tree branches on your roof will wear your roof material faster. Additionally, constant shade from the sun will cause dampness on your roof leading to faster deterioration.
  6. Your house might get musty and cold due to improper circulation of air.
  7. Large root systems can cause damage to the foundation of your house, eventually affecting the entire structure. If there are cracks in the foundation, tree roots can grow into them, causing problems such as foundation uplift, sinking of buildings where roots have leeched water from soil and penetration into water and sewage pipes.

To prevent all these problems, you should trim and prune all trees and vegetation that grow around your house to keep it under control. Tree branches should be at least 4 to 6 meters away from your roof. Before you plant any trees, learn all the facts about them, including how long their branches and roots will grow. Big trees should be planted farther away from the house.

Safe removal and trimming of trees is important to prevent damage and accidents. If you are not confident about trimming overgrown tree branches, contact a professional in your area to do it for you.

fences-7

5 Tips to Remember for DIY Fencing

Are you tired of your neighbor’s dogs and kids always running into your yard? Do you feel as though you could do with extra privacy and increased security? Fencing your yard is a great way to achieve all these things.

If you have some spare time on your hands or feel in need of a DIY project, then consider installing a fence. In order for you project to turn out right, there are some tips you should consider:

  1. Familiarize yourself with the building rules and regulations of your local area.

Most local authorities have very strict rules for fence installation. If you don’t follow the correct zoning rules, this could land you in legal trouble and you might even have to take your fence down.

It’s also important to confirm where water, gas, electricity and sewer lines run, so that you don’t damage them.

  1. Discuss your plan with your neighbors

Discussing your intentions to fence your yard with neighbors who share your property lines will prevent any friction from popping up. It’s also a great way to share fencing costs, so before you start building your fence, ensure that all owners of neighboring properties are aligned with your plans.

  1. Take measurements and create a plan

Before you start digging, map out your plan on paper. If you start working without accurate measurements, you will botch your fence installation project. Correct measurements will also influence the quantity of material you buy.

  1. Buy fencing material and ensure you have all the relevant tools

There are many types of fencing material available on the market and your choice will depend on the reason why you need a fence. When choosing fencing material, also consider that some materials are easier to work with than others. Discuss available options with the sales clerk at the hardware store and choose the right one for you.

Additionally, ensure you have parts such as screws and nails, as well as all the tools needed.

  1. Don’t forget the entrance

A fence is not complete without an entrance to match. Whether you decide you want a pedestrian gate or a driveway, incorporate it in your plan. A great entrance can add a great dramatic effect in your overall fence design. Not to mention, it is a great way to add security to a home and maintain privacy.

Basement-Flooring-Ideas-With-Wall-Design

5 important questions to ask yourself when you want to finish your basement

If your house is old, it’s very likely that it has an unfinished basement, with cold, bare concrete and exposed studs, and its main purpose currently is to hold all the junk you don’t really use. This doesn’t need be the case anymore, as it’s possible to finish your basement and turn it into a warm inviting space, just like any other part of your house.

But before you go about transforming your basement into a livable space, it’s important to take into account the challenges you might face. To do this, you have to ask yourself the following questions:

  1. Do you have a moisture problem?

If your basement is damp or has visible pools of water all the time or periodically, you have to get the problem under control before you start finishing up the space. Failure to do so could result in more problems in future, such as a weakened foundation and mold.

  1. Is your basement already connected to the main heating and cooling system?

If not, is it possible to tap into the existing system that is used to heat and cool the rest of the house? If this is not an option, will your budget allow for a new heating and cooling system? All these questions can be answered by a professional who specializes in installing heating and cooling units.

  1. Will the renovation interfere with ducts and piping?

If there are any pipes that run below the ceiling level, they might need to be moved, especially if they interfere with ceiling height.

  1. Is your ceiling high enough?

A quick check with your contractor or with the building department offices in your area, will reveal whether the ceiling of your basement is up to code. If you don’t have much headroom to begin with, using drywall might be the way to go as installing a suspended ceiling might diminish ceiling headroom.

  1. Has your house been checked for radon?

Some geographical locations have high amounts of radon in the soil. Radon is a radioactive gas and because it’s odorless and colorless, it’s difficult to detect. If tests reveal a high level of radon, house inspectors will advise on measures to take to make the basement habitable.

Handyman-On-Call-is-proud-to-announce-that-we-have-become-a-member-of-the-National-Chimney-Sweep-Guild

Handyman On Call is proud to announce that we have become a member of the National Chimney Sweep Guild

Handyman On Call is proud to announce that we have become a member of the National Chimney Sweep Guild.

For any chimney cleaning work, Handyman On Call is your complete professional chimney and fireplace company. We provide most anything for your fireplace and chimney. From sweeping to installation, to restoration – we always provide a detailed and easy-to-read level-one inspection report for every chimney project.

Handyman On Call is proud to announce that we have become a member of the National Chimney Sweep Guild


mold-remediation-4

The 5-step mold remediation process used by professionals

Mold finds its way into people’s homes by blowing in through the AC, windows and doors, or by attaching to pets, clothes or other items. Once in the house, mold spores seek out moist areas, where they form their colonies. It’s therefore important to remove all sources of moisture before any remediation (cleaning) efforts can begin, as not doing so will cause the mold to colonize the area again.

Mold remediation should be done in the following five steps to prevent this nagging problem from coming back:

  1. Identifying the source of moisture that is feeding the mold.

The source of a water leak might not be obvious so it’s important for the remediation company to conduct a thorough inspection of the whole house to find the source of moisture leakage.

  1. Documenting, through photographs, videos and writing, the details of the infestation.

Detailed documentation will help the remediation team come up with a plan. The plan can include details like: the timeline for the cleanup, resources needed for remediation and whether you will need to move out during the cleanup. Proper documentation will also serve as a reference point in case of future problems.

  1. Assessing the extent of the contamination.

This is important because mold can spread beyond areas that are visible on a day-to-day basis. Knowing the extent of the spread, will aid in crafting an approach for cleanup, without missing any part.

  1. The cleanup (remediation).

Before beginning, the area with the mold infestation has to be isolated by sealing with plastic sheeting and duct tape. This is done to protect you, your family and the rest of the house from mold contamination.  Once the area is completely sealed off,

  1. The source of moisture leakage is repaired to prevent growth of new spores.
  2. Dust in the contaminated areas is suppressed by misting. This will prevent any spores or dust particles from escaping during cleanup.
  • Wet or moldy material is bagged and taken outside.
  1. All non-porous items and surfaces are cleaned using a wire brush then wiped down with disinfectant wipes. The process is repeated with detergent solution until all mold is eliminated, then the surfaces are dried with cloth. Depending on the level of mold contamination, a vacuum cleaner can also be used, followed by a thorough wipe down with a damp cloth and detergent solution.
  2. The room is then dried thoroughly and all materials that were removed are replaced.
  1. Verification process to assess whether the cleanup was successful.

The following are signs of a mold-free room:

  • Absence of dust, dirt, mold or a moldy smell.
  • A completely dry room, without any signs of wetness.
  • There should be no furniture or surfaces in the room with mold on them.
  • No one in the house should complain or suffer from physical symptoms related to mold inhalation.

Mold remediation should only be performed by professionals, who have the right equipment, disinfectants, protective clothing and knowledge of how to fight mold.

fire-restoration-5

Do’s and don’ts of Fire and Flood Restoration

Floods and fire can cause damage in the hundreds of thousands of dollars. Though floods do not consume property like fire does, damage resulting from flooding is just as bad, as most property usually cannot be salvaged after water damage. Additionally, flooding comes with a string of related problems such as mold and weakened foundations.

After floods or a house fire, it’s vital to start restoration immediately in order to prevent further property damage. The aim of restoration is to rebuild and eventually get settled back in. It’s advised to contract a professional to perform the restoration process as the structure of your house may have been weakened depending on the extent of the damage. Electrical hazards are also imminent, especially in cases of flooding.

As safety is the most important thing during disasters such as fires and floods, it’s important to remember the following list of do’s and don’ts, as doing so will keep you and your family safe until the inspection is done:

What you should do

  1. Contact your insurance agent after a flood or house fire.
  2. Hire a professional restorer to start cleaning, repairing and restoration. If your restoration company does not work with your insurer, make sure to coordinate their efforts so that you get the best settlement possible.
  3. Turn off water pipes to prevent water damage as some pipes could have burnt off.
  4. If you’ve been allowed back into the house, keep wet areas well ventilated by opening windows and turning on the air conditioner and heating.
  5. If any valuables have been salvaged from the floods, keep them in a safe dry place.
  6. Mop or sponge off any standing water.
  7. Before using any water after a flood, get your water supply line inspected for contamination with drain backup.

What not to do

  1. Do not go into your house after a fire or while your house is flooded. Roofs and floors can cave in if the structure of the house is damaged. You could also suffer electrocution from exposed electric wires.
  2. Don’t try to do the cleanup yourself. Cleanup and restoration needs specialized skills and equipment.
  3. Do not touch anything until the insurance company has made its assessment. Tampering with the house and its contents will negatively impact your settlement.
  4. Do not turn on any electric supplies after a flood, until they have been inspected.
  5. Don’t sleep in a room with wet carpets, floors or other items as this could expose you to respiratory illnesses.
  6. Don’t use heat to dry off closed areas as this could result in mildew or expand the moisture damage.
  7. Don’t use your vacuum cleaner to remove stagnant water.
  8. Avoid handling wet carpets without professional help as this could cause shrinkage or further damage.