How to hire the best handyman service

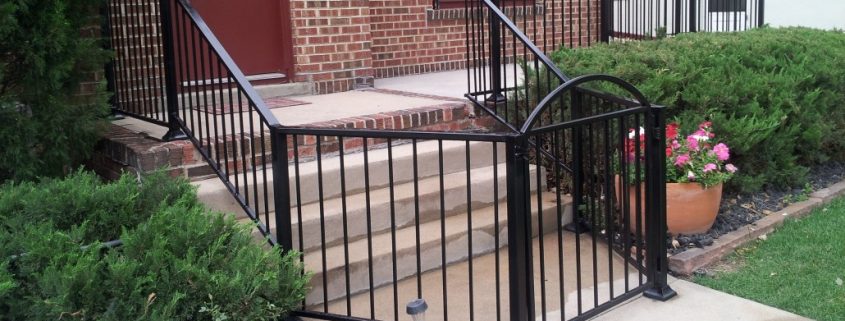
When you think about getting a handyman to help you with a repair or maintenance issue at home, you often think that the handyman will be specialized in one specific task like carpentry, plumbing or electricity related. These days however, you can find a handyman for all sorts of tasks such as tree services, fences, mold remediation, mowing grass and general outdoor maintenance.

Whatever task you may need done in your home, you can probably find a handyman to do the job for you. That being said, not all handymen are equal in how they perform their duties so you always want to make sure that you hire the best handyman that you can. Below are some considerations you should keep in mind if you want to hire the best handyman for whatever job you need done.

Steps

  1. List details of the job and your expectations: Before you contact any handyman, create a list of all the work that you need done and have in mind your expectations for successful completion of the task.
  2. Start looking for reliable references and candidates to do the job: You could get references from your neighbor, family or friends who have had good experiences with certain handymen. You could also go online and look for local handymen who have good reputations and reviews in your local area.
  3. Ensure that the handyman is bonded, licensed and insured: Reputable and reliable handymen are bonded to protect you from incomplete jobs and unpaid workers or supplies. They are insured to protect you and themselves in case of work related injuries and they are licensed to prove that they are well trained and recognized in the industry.
  4. Find out cost estimates for labor and supplies: Get the handyman to come over and assess the job that needs to be done and give you an estimate for the total cost of the job, including the cost of labor and any materials that will be needed to complete the job. Ensure that the handyman commits to an estimate that is within a range of 10% of what he/she quotes.
  5. Establish a schedule for completion of the work: Determine when the job will start and when the job should be completed. Make sure that you hold the handyman to the schedule that they commit to.
  6. Get it all in writing: Lastly, get everything that you have agreed to into a contract, to avoid any miscommunication, confusion or forgotten details from either you or the handyman.
roofing-6

Is hiring a roofing handyman better than doing the job yourself?

There are a lot of good things that can be said about a person who can do any handy work themselves, but when it comes to roofing jobs, it might not be worth it doing the job yourself. This is especially the case if you don’t have any experience doing roofing jobs simply because the risks that you have to take outweigh the rewards of doing the job yourself.

In any case, whether you think that you may be qualified enough to do the job or not, it may be worth asking a professional handyman for a quote to have them do the job. In most cases, you will find that it will be easier to get a professional to do the job perfectly once and for all.

Below are the main reasons why this may be true.

Expertise on the job: If you don’t have enough proficiency and knowledge on the best practices for roofing jobs, you may do the job in a substandard way. This will mean one of two things.

  1. At best, you will either need to re-do the job sooner than later and maybe even hire a handyman to do the job for you in the right way later on.
  2. Worse yet, you will risk doing further damage to your roof, which will cost you more than what you would have spent to get a handyman the first time around.

Guarantee to get the job done

If you hire a handyman to do your roofing job for you, you can rest assured that the job will be done according to budget and with no incidents that need to worry you.

Why? This is simply because a professional and reputable handyman is licensed, bonded and insured. This means that even if they get injured on the job or if the job is not completed for one reason or another, you can rest assured that you will be protected and that your roof will not be neglected in the middle of all the chaos, if any.

Effectiveness, efficiency and safety

Even if you can do the roofing job yourself, can you do it within a good timeframe? Probably not. This is because you may need to take your time to do the job right which will cost you time and probably money because you will sacrifice the productive time you can spend on other tasks that you can do better.

Hiring a professional roofing handyman is efficient and effective because the professional has experience and knowledge of the job and they therefore don’t need to dabble on the job.

fences-12

Making a bamboo fence

Bamboo fences can bring a resemblance of the East to your yard. Bamboo is durable and weather resistant and its color and texture naturally complement almost any landscape. The best part is that you can build a bamboo fence simply by following these steps.

Instructions

  1. Digs holes that measure 1 foot (0.3 meters) deep and at least 4 feet (1.21 meters) wide, using a whole digger or shovel.
  2. Insert bamboo poles into the holes; use a string to ensure that the caps are properly balanced. Wrapping post holes after filling.
  3. Check the inside of the posts at intervals of 6, 12 and 24 inches (15, 30 and 61 inches) from the top. Drill pilot holes through the posts at each mark to prevent the bamboo from splitting.
  4. Attach your bit to a drill and drill the holes. Slowly increase the speed of the drilling until it makes a complete hole through the post. Repeat for each post.
  5. Hammer posts about 24 inches (60 cm) below ground level and secure to the ground by pushing down firmly.
  6. One inch (2.54 cm) of additional bamboo should be inserted ½ inch (1.27 cm) into the post. Once you know the position of each piece drill a hole ½ inch (1.27 cm) in each position.
  7. Insert studs and when they are placed straight, rotate each way. Affix it to the post with a sufficiently long nail to pierce the post. Avoid hitting the nail on the bamboo or it may break. If you have trouble installing a cross beam, enlarge the hole with a wood tool.
  8. Add vertical rods. Use a string to make sure they are level. Cut the top edge facing up to the nearest board.

Tips & Warnings

  • The addition of a vertical pole is optional. It is mainly used to provide a more finished look; it does not improve the structure of the bamboo fence.
  • Never pierce directly on bamboo; use a drill and nail driver.
  • Use gloves to avoid splinters.
  • Apply petroleum or natural preservatives.
  • The bamboo poles vary in color, righteousness, cracking and joint position. Take this into account when planning your design.
fences-6

Ideas inexpensive fencing: cement blocks

Building a fence in your backyard can be an expensive project. Many homeowners choose to have a fence for privacy. Probably they use the walls to protect children and animals and mitigate the noise from the outside. Whatever the reason, there are ideas for inexpensive fencing using cement blocks. This is one of the cheapest fencing materials, and use them strategically can save you money on your fence.

Honeycomb

Staggering the blocks to create a honeycomb effect can leave your wall with aesthetic interest. By doing this, you will use fewer blocks to cover the yard (0.91 m). This style fits well with modern, mid-century houses. The spaces on the wall make the area look more clear than that of a solid concrete wall, Because of the openings, this wall works for older children because they cannot escape through the spaces that are 10 to 12 inches (25 to 30 cm).

Large blocks

Design the wall with the largest blocks you can get. This will reduce the amount of blocks needed for the job. If you choose to hire someone to help you install the fence, using larger blocks will reduce the amount of hours needed to place them. The cost savings will depend on the availability and cost of blocks you chose. Check with your local retailer and compare prices to calculate how many blocks of each size are needed to build your wall.

Dry construction

If you are using your fence to block noise from a noisy road or railroad tracks, you can order the blocks to build your wall. This means that you will not use cement to bond the blocks, which will save you money. The wall must be in an area where they do not deteriorate and will not be near children or animals. Dry construction also takes less time to complete, saving money in labor.

Height

By building a wall 4 feet (120 cm) instead of 6 (180 cm) to 8 feet (240 cm), you can save money on blocks. You will use between 2 and 4 rows around the perimeter of your wall to shorten the height. Consider the needs of your wall being built. If there is no reason to reach 6 or 8 feet, then shorten your wall to shorten your expenses.

Bedrooms

How to remodel small bedrooms

Living in a small space can be tricky. It’s easy to feel overwhelmed when nothing has its own place. A bedroom should be practical and it’s hard when you do not know where things are. Any small bedroom can be maximized by choosing the colors wisely and focusing on the function of the space and to prevent disorder at all costs.

Instructions

  1. Pick a color that makes the most of the space. If you intend to paint the whole room, opt for a strong tone. If you are determined to use a dark color, choose a wall to paint and leave the rest of the room with a neutral color.
  2. Apply two coats to achieve a uniform color.
  3. Use a palette of colors to choose which can be combined with the rest of the room. Try Color Smart at Behr.com to make a wise decision. Opt for quilts, art and accessories to complement the room.
  4. In a small room everything must serve a purpose. Whenever possible, have things that serve two purposes. Choose a bed that is also used for seating. For a very small room, opt for a futon that can function as a sofa during the day or even a murphy bed those folds into the wall.
  5. Place a yoga mat under a carpet so you just have to lift pull it out to do your exercises.
  6. Choose light fixtures that are versatile. Place floor lamps that have shelves built-in to avoid having to place them on a wall.
  7. Keep flat surfaces ordered. Once you’ve lost the battle with the nightstand, it will continue to the desk. Don’t let papers and trash accumulate on the dressers to keep your room looking tidy and to make it look bigger.
  8. Everything should have its place. If you need a specific item, you should have a designated storage location. If you do not need an item, throw it away or donate it to avoid clutter in your room.
  9. Take it or leave it. You must get rid of anything you have not used for over a year.
bedroom-design4

How to organize your room

Arranging the furniture in your room can be a challenge, particularly if you work with large furniture in a small space. Ideally, your bedroom should be your sanctuary, and should be organized in a way that promotes the naturalness of the space and turn it into a pleasant oasis for you to retire at the end of the day. With just a few adjustments, any room can be transformed, even if you have no experience with design.

Instructions

  1. Arrange the bed first. Typically, the bed is the center of the room and the point of focus. Ideally, your bed should be located on an interior wall, particularly in colder climates where the outside walls can be cooler. If the size of the bed does not allow that, try to center it between and below the windows.
  2. Add nightstands. Even if you live alone, have two of these tables, one on each side of the bed, so you can center the design of the room and make it look balanced. Small lamps can be placed on tables to generate a little height to the area.
  3. Your bathroom should be located near a closet. This will make it easier to get dressed in the morning. If you cannot do it in your room, the bathroom should ideally be located on the opposite side of the bedroom.
  4. Walk around the room to assess the amount of space left and see if the room is balanced. If you have enough space to move, you can add some more objects, such as a TV or baskets for linens and pillows. If space is limited, add the minimum and essential furniture, and other areas of the home should be used for storage. Stand at the door and look around the room. Check if it is composed, or if it needs a final touch.
  5. Add one more piece to emphasize and unite the entire organization of the room. Whether it is a favorite bedding, pillows or a special object that has meaning to you, put it in a prominent place in the room. This will help close the design.
concrete repairs stairs and sidewalk

How to install pipes in a concrete slab

Pipes should never be installed horizontally through a concrete slab on the floor. All pipes run beneath the slab supports in the floor. The lines then “go” vertically through the slab to allow subsequent connections to be made. The process for installing pipes in a concrete slab is physically demanding and you must be mechanically precise. You must install the pipe to the exact specifications as detailed in the construction drawings.

Instructions

  1. Mark the place where you have to dig to place the pipe using a measuring tape and spray paint. Pay close attention to the measurements shown in the drawings of your building; work on the location of each line below the concrete slab. Mark existing pipe lines with a line of spray paint and mark the spot where the pipe will slab with an “X” placed in a circle. Place this mark a few feet from the line that marks where the existing pipe is so you do not miss the mark when you dig the trench.
  2. For excavating the pipe trenches, depending on the length of the slab and the required placement depth, you may want to use a mechanical digger instead of a hand shovel. Make sure you meet all applicable OSHA regulations for digging a trench safely.
  3. Install the pipe and all connections in the trenches you have made, making sure the pipe rests on the pipe supports specified in the drawings of your building. Provide a vertical connection in places where every pipe must pass through the slab. Make these tubes long enough to extend a minimum of 6 inches (15.23 cm) above the top of the concrete slab.
  4. Cover the mouths of all outputs with tape to prevent debris from entering the pipe. Concrete debris or dirt entering the line can form a blockage in the pipe that you will not notice until the pipe is connected. By then, you’ll have to break the concrete to access the pipes to determine where the blockage is.
  5. Using a hand shovel or excavator to fill (cover with soil) the pipe lines, completely fill the trench so that the backfill is level with the floor of the lower area of ​​the slab.

Tips & Warnings

  • Spray paint pipes of plumbing lines so they can be easily seen by anyone working in the area of ​​the slab. The tubes that cannot be seen often break before the area of ​​the slab is poured with concrete by machines and workers.
  • Use appropriate safety equipment when installing any type of pipe. This includes shoes, belts and back support. Even if you’re working with PVC pipe, the weight can damage your back or crush your feet if they are not properly protected.
floors

How To Brighten Tile Floors

Opaque tile floors can make a room feel dirty, even when you’ve just finished cleaning them. The tiles lose brightness for a variety of reasons, including damage to the shiny surface and dirt. The cleaning can leave a film, resulting in dull and faded tiles, which can be resolved with the correct cleaning method. Most tile floors are ceramic, although there are options in porcelain, stone and linoleum. All tile floors except linoleum, respond well to the same cleaning methods.

Instructions

  1. Sweep the floors daily with a mop. Dirt particles left on the floor can scratch the tile, ruining the shine and giving them a permanent cloudy appearance.
  2. If the tiles are opaque because of hard water or dirt buildup, mix 1/4 cup vinegar with 1 gallon (3.8 liters) of water. Clean the floors with a sponge mop and the vinegar solution.
  3. Clean the floors with clean water. Wring the mop frequently and change the water if it gets dirty or cloudy. Mops with dirty water leave behind a thin film that reduces glare from the floor.
  4. Mix one or two squirts of dishwashing detergent with 1 gallon (3.8 liters) of water if the floor is opaque, but not dirty. Clean the floors with this solution. Do it again with clean water to remove remaining detergent.

Tips & Warnings

  • Commercial cleaners for tiles are also available. Use only cleaners formulated for the specific material of your floors.

Do not use vinegar on linoleum, since the acid product can damage the surface. Use detergent and water to restore the luster of this type of material

interior-renovation-7

How Much Does An Interior Designer Cost?

Interior designers can make drab interiors look new and fresh, and even have their own TV shows and product lines for the home. For those with a sense of style and a good eye for detail, interior designers become not only a good choice, but also a lucrative career. Understanding the revenue potential of an interior designer can make challenges faced in school and training worthwhile.

Identification

Interior designers are part artist and part architect, and base their philosophies on what’s learned in the classroom and must remove themselves from their own aesthetic style. The average salary of an interior designer is between $ 31,000 and $ 57,000 for a designer with a four year degree. Other factors such as the workplace and experience can significantly increase the revenue potential of an interior designer. Interior designers who make a name for themselves in a given market, and are identified with high-level design, can expect to earn much more than the average range.

Types

Some interior designers are employed in furniture stores as designers and construct surrounding furnishings. This type of employment is very constant, especially compared to contracted independent designers, but tends to deal with only one type of interior design. For example, an interior designer who works for a furniture store may have to be focused on a couch, table or other furniture in order to sell these items to customers. However, compensation for this kind of work is slightly above average, with an expected salary of $ 36,650 to $ 38,980.

Benefits

About a quarter of the interior designers were employed by architectural and engineering firms in 2013. Salaried interior designers working in architecture or engineering companies can expect a more stable employment and a higher salary than average of $ 46,750. Some of the benefits of this type of employment include retirement, health insurance and the possibility of increased exposure through high end interior design projects.

Considerations

However, just over a quarter of interior designers are self-employed. While the work plans for interior designers who are self-employed is more irregular than those employed in retail, reputation and success impact your earning potential. As a rule, interior designers working on their own charge an advisory fee according to their level of skill and reputation, as well as a percentage of the cost of furniture, accessories and other products used to redesign an interior space. The average salary of an interior designer in 2013 was just over $ 42,000, but employment may be sporadic.

Potential

Although 10 percent of interior designers with the lowest salary earned less than $ 25,000 a year, they were usually self-employed or paid by commission in retail account, while 10 percent of interior designers with higher pay earned more than triple that. The best-known interior designers or those who have a unique vision and a reputation for his designs can earn more than $ 78,000 a year and have a stable job.

concrete repairs

DIY Ready Mix Concrete

Many projects require the use of a ready mixed concrete. However, companies that manufacture this product often add unnecessary additives that are not friendly to the user or to the environment. If you want to make sure that the product you are using contains only pure ingredients, you can buy them separately in the store and do the mixing yourself.

Instructions

  1. Place a bucket in a suitable area.
  2. Determine the amount of mixture needed for your project. Convert this amount to units that are simple to work with, such as cups or gallons (which will measure with gallon buckets).
  3. Multiply the required amount obtained in Step 2 by 0.15, or 15 percent. Add this amount of cement powder into your wheelbarrow or bucket.
  4. Multiply the amount obtained in Step 2 by 0.14 or 14 percent. The result if the amount of gallons of water that needs to be added to the cement powder. Mix using a shovel.
  5. Multiply the amount obtained in Step 2 by 0.28 or 28 percent. Add this amount of fine aggregate, such as clean sand, to the bucket or wheelbarrow and mix using a shovel.
  6. Finally, multiply the amount obtained in Step 2 one last time by 0.37 or 37 percent. Add this amount of coarse aggregate, such as gravel to the bucket or wheelbarrow. Stir everything using the shovel.
  7. Pick up some of the mixture with the shovel and fold it back into the mixture. Continue stirring the concrete using this movement for 10 to 15 minutes. This adds the amount of air required to the mix, in the same way a similar movement adds air to the cake batter.
  8. Use your mix as you wish.