Improving the Thermal Insulation of your Home

A home with good thermal insulation can save up to 30% of energy, which has direct effects both in the electric bill and in the CO2 emissions to the environment. What precautions should we take to improve the thermal performance of our home? Here are some tips:

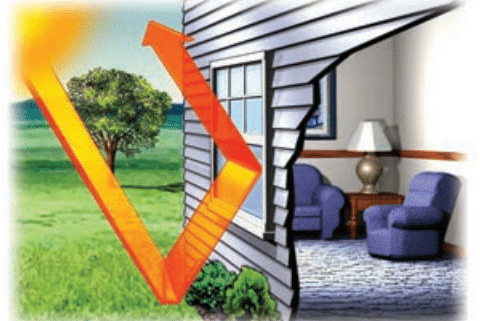
The thermal insulation of a dwelling is the capacity that it has to retain heat (in winter) or cold (in summer), which we basically generate through heating and/or cooling systems. No matter how much we invest in a good air conditioner or a good heating system, it will do little good if the house is not well insulated.

But not only because of energy saving or environmental awareness, but also because, in less than a year – as of January 1, 2013 – the Royal Decree of Energy Efficiency of Existing Buildings announced that it will require all homes that are bought, sold or rented in Spain have a certificate that guarantees their energy performance.

In this way, the homes will have a distinctive efficiency similar to that already have the appliances, which will also affect the sale or rental price of the same. In fact, housing will be classified by a series of letters, ranging from ‘A’ (maximum efficiency) to ‘G’ (lowest energy efficiency).

Let’s see what are some aspects you can take into account to improve, without major investments, the thermal insulation of our home:

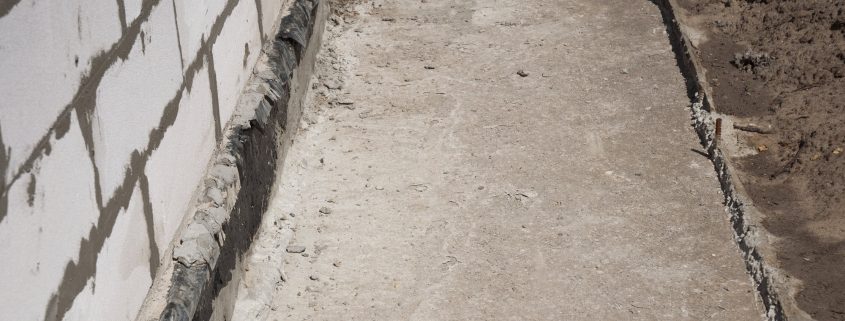
In a home, heat loss occurs through windows, doors, floors, walls and ceilings. In the case of windows and doors to the outside, it is very important to check that there are no leaks of energy and, if they do, take the appropriate measures. In floors, walls or ceilings it’s essential to have good installation with effective products and high thermal resistance. If the house is older, there is a wide variety of materials that allow thermal insulation of a wall, a floor or a roof to be reinforced.

The windows are one of the weaknesses of the house. To minimize their leaks of heat or cold it is advisable that they have double pains and, if possible, an air chamber. It will also improve their thermal insulation capacity if they have a quality carpentry (PVC, for example) which prevents the formation of thermal bridges, as well as having a specific glass to reduce heat losses.

In summer it is highly recommended to use awnings and blinds to minimize overheating your house.

In winter, however, we must take full advantage of the sunlight and let it in through the windows by leaving curtains open.

Finally, it is essential to ventilate the house well in the morning and at night. Ten minutes is enough to renew the air of a room.

tree-services-16

Colors that Combine Well with Green

What colors match with green? It has always been said that green is for the daring, but you just need to know what to combine the color with to make the perfect setting in your home.

In addition, there are many shades of green that exist to decorate your walls, furniture or fabrics, from light greens to darker olive greens or more striking green apple. This is why we will see great ideas to discover the colors that combine well with green.

Ideas to integrate green in each room

After seeing how green can combine with numerous colors, what better than to see how we can integrate it into each environment? For many, the basic idea of ​​being able to combine color in a room is by applying it to the wall. But depending on the tonality that we choose, also combining green is something simple if you use the correct furniture or basic details.

Living rooms in green

If you have a small living room, you can paint some wall in light green tones. More than anything because it will give more light to the room. It is best to choose the main wall and let the others stay in a basic or neutral color.

To add some contrast, opt for the furniture in light finishes. The details are also important to integrate green color. You can leave the walls aside and add both rugs and cushions or even a sofa in your main tone.

Bedrooms with brushstrokes of green

In bedrooms, it is more common to see curtains or decorative details in green. Opt for neutral tones for the walls to help with relaxation.

Of course for the youth rooms, it is not too much to integrate a very striking green color, because it also gives light to a lot of fun.

Kitchens and the color green

Again, this combination is more than perfect if we have a very vibrant tone. In this case, both cupboards and countertops may have a similar green hue such as pistachio.

Opt for details in softer shades or in simple prints, without very vibrant colors.

Green dining room?

It is recommended to purchase furniture in all colors except green. In the dining room, leave the green again for the details. The upholstery of the chairs or cushions of the same, some lamp or, paintings and even mirrors. It is best to avoid it on the walls, although if it is your taste, then choose a soft tone, which brings freshness along with softness.

Colors that combine with aquamarine

Aquamarine or a light sea green, has a double blend. It can be said that it has brushstrokes of green but also of blue. Undoubtedly, whatever it is, the result is special and very intense.

To create an elegant ambiance along with romantic airs, this color can be combined with very soft shades of brown. Beige or cream will be perfect for aquamarine. Also pastel pink can be added to complete a very chic style.

Of course, we cannot forget the basic white color and the pearl gray, which as neutral tone and will also be perfect to complete a magical decoration.

Colors that combine with green on walls

If you have decided to paint the walls in green, you have to make decorations that g with the chosen tone. If the color is very vibrant, then it is best that the furniture and other details are basic or neutral tones. That is, white or cream color would be great ideas. This way, you will have a balance in your decoration.

Although, as we know there are tastes for everything, there is also the opposite option. Walls in vibrant green with furniture of the same style. Orange or acidic tones, like fuchsia, will bring us an extra shine to that originality. But always in small doses because we can end up saturated with too much color. If the tone of the wall is clear, you can bet on wooden furniture in dark color to create a great contrast.

Of course, if the room is small, use white to give more depth and luminosity to the room. So, when in doubt, the best is white and beige. To create a unique and innovative style, you can use the most colorful colors.

Different ways to combine green with other colors:

Green and blue

Blue is another of the colors that combines well with green. For this combination it’s advised to use bluish greens reminiscent of the sea such as turquoise. They blend very well with light blue and green and even dark navy blue.

This combination creates cool environments and is perfect for homes on the beach, living rooms and bedrooms.

Green and brown

It is a perfect combination because it alludes to nature, trees, grasslands and forests. In this combination you can use the most striking greens to the darkest.

Green and pink

In their lighter shades this combination is perfect for girls’ bedrooms, but in their more saturated version they can create a very funny and eye-catching decoration.

Green and white

As with any color that is combined with white, a serene environment with a touch of color is achieved. This combination is suitable for any part of the house, whatever its function. In terraces and gardens green and white are perfect for their allusion to nature, but can also be used in bedrooms or living rooms.

Green and yellow

Being two very similar colors, this combination is perfect in its more acidic versions, but it is not advisable with dark greens.

mold-remediation-4

How to Dry a Water Damaged Ceiling

If your roof has water damage, you will need to remove the drywall and let the inside of the roof dry out. If not, mold may grow inside your ceiling. Correct the initial cause of the leak to avoid future damage. If you are not sure where the leak is, ask a professional roofer or plumber to inspect your home. If you notice mold development anywhere in your home, hire a professional mold-removal contractor to get rid of it immediately.

Instructions

  1. Push gently over the area to determine the magnitude of water damage. You have to remove and place sections of plasterboard that are soft or severely arched.
  2. Use a knife to mark a line around the entire damaged area.
  3. Break apart the area within the score lines with a hammer and remove all damaged plaster.
  4. Reach inside the hole to find the wooden posts closest to the edges of the hole. Use the knife and hammer to remove the plaster up to the wooden posts, leaving a square or rectangular hole in the ceiling.
  5. Remove some gypsum (drywall) panels in the middle along the uprights on each side of the hole (leaving half of the exposed beam showing to allow for installing screws to secure the new piece of gypsum).
  6. Set fans and dehumidifiers up to dry the interior ceiling area. If the outside air is dry, open the windows and doors to let fresh air in. Depending on the magnitude of the water damage, it could take several days for everything to dry completely. The goal is to avoid the development of mold after closing to the ceiling. Do not proceed until the interior of the roof is dry.
  7. Cut a new piece of plaster to fit the hole. Use drywall screws and a drill to attach to wood. Install screws every four to six inches along the outer edges of the hole where the wooden crossbars are. This will strengthen the connection between the existing roof and the new part.
  8. For normal ceiling, use a 6-inch gypsum knife to compound on each joint. Place a section of drywall tape over the composite and wipe it flat. Fill in all heads from the screws. Wait for the joint compound to dry completely (usually 24 hours). Use a 12-inch gypsum knife to apply a second layer of compound over the entire area, this time leaving a thick, soft layer. Allow to dry and then sand the area with 150 grit sandpaper.

Prime and paint as normal. If you notice rusty or yellowish water stains showing through the composite joint, use a special concealed primer (available from hardware stores). Ask the staff or check the label to verify the primer is specifically designed to conceal water stains.

kitchen-82

Choosing a Paint Color for your Kitchen

The kitchen is the heart of your home and is inviting to family and friends to enjoy each other’s company. A simple decorating project can be to create this atmosphere in your kitchen by added some color.  If you choose the right paint color, you can create the most gorgeous room in the house.

Instructions

  1. Control the color ratios when designing a color scheme for cooking. A good rule is to divide the use of color into three components, using your main color in 60% of the room or on the walls.
  2. Bring a notebook with fabric swatches, wallpaper, countertop and cabinet colors you’ll use in your kitchen when you go to buy paint. When fabric samples are not practical, get paint samples first and then combine it with the other items.
  3. Experiment with a combination of contemporary colors that combine opposite colors on the color wheel. For example, a rustic kitchen can be painted red and green to get that attractive complementary aspect to the eye.
  4. Choose colors that are close to each other on the color wheel to achieve a combination of similar color to your kitchen. Combine citrus shades such as lime green, lemon yellow and orange to create a striking and cheerful combination.
  5. Use multiple shades of a single color to create a monochromatic color scheme for your kitchen. This is successful especially when you choose neutral colors for a contemporary monochrome look.
  6. Choose colors that encourage enjoyment of food. Experts say the color red is a color that wets the appetite, making it ideal for painting kitchens and dining rooms. If the idea of ​​painting all your kitchen red seems overwhelming, just paint one wall in this striking color and the rest with a neutral color.
  7. To keep things fresh paint your kitchen with a soothing shade of blue or green. These colors create a relaxing environment for eyes and are suitable for kitchens with western exposure.
  8. Choosing a lighter color for the ceiling of your kitchen will make it feel larger. If your ceiling is not flat, you can choose two colors ​​to make clear contrast between the angular parts of the ceiling and the center.
Carpet Cleaning Services

Natural Solutions for Deodorizing Carpets

Several everyday situations can make your carpet become a smelly mess. Pets, children and even adults can leave unpleasant odors trapped in the fibers of a carpet. These odors can last for weeks and resist normal carpet cleaners. There are several ways to freshen smelly carpets using nontoxic and common household products.

Vinegar

Natural and cheap, vinegar does not mask odors, it removes them. Pour undiluted vinegar in a spray bottle. Start at one end of the carpet, and spray the bottle while moving forward and backward. Continue in this manner while moving across the carpet until you have saturated the fibers. As the vinegar dries, it eliminates the odors that are trapped.

Sodium bicarbonate (Baking Soda)

Used to clean and deodorize, sodium bicarbonate naturally eliminates pet odors, smoke and many other unpleasant odors from carpets. Cover the entire carpet with a thin layer of baking soda and wait several hours. If odors are strong, leave the baking soda overnight. Remove the powder with a vacuum cleaner. Repeat the process as often as needed to refresh carpets that smell bad.

Corn starch and herbs or spices

Instead of buying expensive carpet powders, create your own all-natural powder using common household items. Fill a plastic container with a lid with cornstarch. Add dried herbs or spices and mix with a spoon. Choose herbs and spices that are to your liking. Lavender, clove, cinnamon and rosemary are just some of the options available. Sprinkle the carpet with homemade dust and rub it between the fibers with a scrub brush. Wait a few hours and vacuum to remove dust from the carpet.

Borax and cornmeal

Borax is a versatile cleaning powder, when mixed with cornmeal, eliminates bad odors trapped in the carpet. You can find borax in the laundry sector in supermarkets. Pour 1 cup borax in a container and add 2 cups of cornmeal and mix with a spoon. Cover the carpet with this mixture and let stand for an hour before removing it with a vacuum cleaner.  Repeat the process as needed when the carpet begins to smell.

Considerations

Before removing odors from a carpet, pass the vacuum cleaner to remove lint, hair, dirt and other debris from the surface. Vacuum the carpet daily to keep it at its best and prolong its life. Use a sweeper equipped with a HEPA filter which helps reduce odors in the air during vacuuming.

masonry-6

Tips for Improving Home Heating with a Pellet Stove

When the trees begin to cover the ground with their leaves it’s a sign that the cold will soon be knocking on the door. That is when it becomes urgent to have a good home heating system. An economic, ecological, profitable and efficient system, such as a pellet stove, which uses biomass as fuel to make the home a pleasant environment. But how can you improve and optimize a pellet stove to heat a home?

The first important point is to take into account the location. Pellet stoves do not have a masonry shell like chimneys, so the heat they produce radiates 360 ° around them. That is why it is important to place the stove in an open room, preferably with a single wall around it, avoiding corners, thus the diffusion of heat has fewer barriers.

These home heating systems have a high calorific value, so with very little “pellet” fuel they are able to generate a lot of heat.  However, that heat can be reduced to your surroundings in large rooms. In these cases, in order to promote the diffusion of the produced heat it is advisable to install a pellet stove with integrated ventilation system.

Not all pellets are suitable for use in biomass stoves. As with chimneys there are woods that are better than others, with greater calorific power. So when buying pellets you must check that it has a low degree of humidity, that in the pressing it has been given a suitable density and that they come from sustainable productions, for example the pellets made with traces of olive bones.

The air to a pellet stove is supplied from below, thus ensuring that all biomass fuel has sufficient combustion and the fire has the required intensity. Lack of air causes fumes and poor heating, so it is important to clean the ash drawer frequently, preferably before each use and before each winter season use a chimney sweep cleaner suitable for pellet stoves to clean the evacuation ducts of fumes.

Finally, make sure that the room where the stove is is properly ventilated, which favors a better heating of the home.

decking services

Four Ideas to Improve Your Exterior Lighting

If you do not want your garden to disappear at night, install good outdoor lighting. In many occasions the decoration and protection of the home, is focused on the interior. But what about the exterior?

Your garden should reflect your personality, decorate it to your liking and improve the security of your home.

A simple way for your gardens to become a cozy and safer place is to install outdoor lighting.  It is not only necessary to have good lighting in summer; in winter, when the nights are longer, and we find fog and bad weather, good lighting is more important than ever.

If you do not know how to go about picking out the right lighting, here are some ideas to improve the lighting of your garden:

  1. Place lights along areas where there is traffic such as the road, main entrance and garage. In this way, you improve the security of your home by increasing the visibility of the entrances and exits. Besides illuminating these areas well, accidents can be avoided because there will not be a lack of light. For this you can use high power spotlights, such floor lights which can be purchased at any home improvement store.
  2. Light up the elements of your garden: highlight those elements of your garden that you like. You can light up tall trees, like small shrubs, flowers, a small pond or fountain. Anything. The trick is to hide the light well and focus the elements correctly so that they truly illuminate what you want them to see, and do not create shadows that instead of illuminating, hide what you want to display. Play with the colors and spotlight combinations, make your garden be eye-catching at night.
  3. Place lights in such a way to create a path: create a path of lights towards the entrance. This in addition to improving visibility at night, makes your garden look much more modern and cozy. For this you can opt for two options: recessed lights in the ground or pathway lights. We recommend this last type of lighting: it does not waste electricity, as most now come as solar powered, and although they do not give much light, it is enough to light the way.
  4. Place torches or candle holders: this type of lighting is purely decorative. It is obviously for the good weather, and will give a very warm look to your garden. These can be placed within the garden if you’re hosting a party or as holiday decorations.
handyman at home

How To Replace Pipe In An RV

Replacing the pipes in an RV is very similar to replacing the pipe in a standard residential home. It’s just a matter of removing the old parts and putting in the new ones. Spare parts do not need to be RV-specific parts. Standard PEX plumbing pipe can be used as a substitute for hot or cold supply lines. Drainage pipes can be standard PVC pipes used in residential plumbing. The only differences are the incoming will go to a fresh water tank and the leaving will go into two separate holding tanks with special adapters for the connections.

Instructions

  1. Close the water supply to the RV. Empty the fresh water tank, sewage tank and dirty water tank.
  2. Disconnect the sink and shower supply line. Cut the tube near the end to remove the connections. Look under the house and locate the other end of the pipe and any coupling on the line. Cut the other end of the tube into the nearest coupling or tank inlet. Pull the tube slightly to make sure it slides freely. Leave one end and tape it firmly to the end of the new PEX pipe. Pull the old pipe tightly with new pipe. Continue pulling until the new pipe appears on the coupling or the other end of the pipe. Remove the ribbon and attach new connections with adapters.
  3. Disconnect the drain hose from the electric unit. Saw the tube in half at the connector locations or anywhere along the pipe that will ease the removal. Remove parts and replace with standard residential PVC pipe and fittings. Use glue to hold couplings in different places. Secure piping while maintaining proper drainage slope in the motor home with nylon flanges.

Tips & Warnings

  • Special RV water baths and water heaters can be used for replacements.
  • Appropriate one-way valves should be installed in all tank and bathroom locations.
  • Each section of the feed tube can be removed and replaced individually. Use as few connections as possible for each section of pipe.
  • Access to plumbing pipes and connections may require the removal of panels from under the motor home.
  • Connections in the fresh water tank and sewer and gray water tanks can be tailored to connect to standard residential plumbing connections.
  • Always take precautions and wear proper safety equipment while using hand tools
drain services baltimore

How to Clean a Drain with a Snake

A drainage snake – also known as a drainage auger – is a tool used by plumbers to clear clogged drains. It consists of a handle, a flexible metal “snake” and a hole in the end to break the blockage. Breaking a nuisance with a drainage snake is something that most homeowners can do themselves, without having to hire a plumber. Drain snakes are available in every hardware store and are available in many shapes, lengths and materials.

Instructions

Shallow clogs

  • Insert the snake into the drain.
  • Push the snake deeper and deeper into the tube, turning the crank clockwise, adjusting to reposition the handle as you go. You can stop pressing when you get to the obstruction.
  • Turn the snake clockwise to allow the auger into the obstruction.
  • Pull the snake slightly backwards to break off parts of the blockage. Depending on the size of the obstruction, you have to do this several times to clean the drain.
  • Run hot water through the drain to remove the jam from the rest of the pipe.

Clogs of deep

  • Remove the trap under the drain with a socket wrench. Directly under the drain, you will notice a horizontal and vertical piece of pipe connecting pipe. This section is known as a trap and will have to be removed to snake the drain.
  • Insert the snake from above into the horizontal piece of pipe under the sink. Force the snake downward when you reach the “T” in the pipe.
  • Push the snake deeper and deeper into the tube, turning the crank clockwise, adjust to reposition the handle as you go. You can stop pressing when you get to the blockage.
  • Pull the snake slightly backwards to break off parts of the obstruction. Depending on the size of the blockage, you’ll have to do this several times to clean the drain. You’ll know the drain is clear when you no longer feel a blockage in the pipe.
  • Replace the trap and run hot water through the pipe to purge the remainder of the obstruction.

Tips & Warnings

  • If these strategies do not work, you may need to call a plumber who will have access to more powerful tools to help get rid of the blockage.
Crack injection 2

How to Build a Concrete House

Concrete blocks can be an inexpensive material for building your next home. They are not only relatively simple and basic, but are also considered structurally sound and solid. In the following article, you’ll learn about the steps required to build a house of concrete blocks.

Instructions

  1. When the company delivers the blocks, the load will consist of 80-90 blocks that must be broken down into stacks of blocks 10-12 and stacked about 2 feet (0.6 m) from the floor where the house will be built.
  2. Mix the mortar according to instructions on the bag, usually 16 shovels of sand and half a sack of cement. Put two to three shovels of sand and then half of the bag of mortar in the truck. Mix the dry parts with a hoe and then add the rest of the sand. Once all the dry parts are mixed, gradually add water and mix until it has the consistency of cake batter.
  3. When the mortar is mixed and ready, put some shovels in the corner. Make sure you have four corners reference to work from and that the walls are relatively square to each other. You’ll build at least four corners until about five blocks high. Spread mortar mix in two thick lines almost as wide as the concrete slab and thick enough to put three or four blocks along. You have a corner of 90 degrees. After the first row has been laid, stagger the next block to put it midway on the lower block. Use a level and plumb in the corner of your walls to be perfectly straight, square and vertical. Use a brush to soften the mud joints between the blocks.
  4. Once the corner walls have been made with five blocks, work on the middle section. Using blocks of lines, stretch nylon cord and tie it around the block. Place the blocks on the corners of the front row and start filling the first course.
  5. Continue until you have the desired height walls, generally 8 to 10 feet (2.50 to 3 meters) high.

Tips & Warnings

  • If possible, hire an assistant. It is always faster to have someone who can help maintain the mix, stack blocks and mortar.
  • Safety first. Never let the walls get higher than allowed. They might be unstable and fall.