Home Decoration 10

Decorating tips for your office

Decorating an office is not just adding some pictures on the wall. When choosing decorative items for your office, it is important that you select elements that reflect the personality of your company. Whether for your personal office or your work office, there are many ways to create an attractive environment without spending a fortune.

Warehouse office

For the storage in your office, be sure to select the most decorative furniture, instead of aluminum filing cabinets. These filing cabinets may work best in a hospital, but for an office with style, choose shelves and desks made of wood or that have an aluminum surface.

Allow customization

Let your team use some personal things to help promote moral, showing off the personality of coworkers and what they like. You can limit the amount to only a bulletin board or shelf of personal items, and consider restricting racist, sexual, political or religious messages so no one feels uncomfortable.

Motivational Poster

Framed posters are not only attractive, but can also improve morale and instill a creative workforce. These can be hung on the wall opposite doors, in the bathroom, or in the break room. Small plates with inspirational phrases are available in decorative stores or office supply stores online and in many US cities.

Plants in the office

Some plants can thrive in an office setting. It is always interesting to observe uniformity and constant change of its foliage, in addition to improving air quality. Having plants in your office is a great way to add decor, whether you choose a tree, an aromatic herb for the window, aromatic floral bouquets or hanging ferns. It is also a necessary element of Feng Shui.

Office color

The color on the walls has a big impact on the mood in the office. Painting helps transform a room cheaply. There are theories on the effects that colors have on productivity and morale of the team. Try to match colors in the room to create an environment that is attractive but not too relaxed. According to Janet Lynn Ford Worx, “The combination of colors may be overlooked when it is pleasant, but may be highly offensive when the composition seems to clash.” Use a color wheel to choose complementary colors and opposites, and search for neutral colors with less thought. Pink, for example, can be relaxing and stimulating, but is perceived as a feminine color and for many men may not be suitable for an office.

electrical-9

Achieving an Antique Look with Gold Paint

Although there are many antique items available in most home improvement and craft stores, you can save money by using gold paint in combination with other materials to create a faux antique gold finish. You can paint any article to have an antique gold finish with the right paints and primers, but ceramic or wood items with a natural matte finish will not give much brightness. To receive an old appearance, a gold finish with give you the antique look with the best results.

Instructions

1.  Clean the surface with a damp cloth in soapy water to remove any residual grease or dirt. Dry completely.
2.  Sand the surface lightly with 120-grit sandpaper to remove stains or minor dents. Clean the surface with an anti-static cloth to remove dust. Sand the surface again with 180-grit sandpaper to make the surface very smooth.
3.  Paint the surface with gold paint. Add one or two more layers, allowing each layer before applying the next.
4.  Sand the painted surface lightly with 220 or 240 grain sandpaper. Focus on the areas that regularly show wear such as corners, the upper and lower parts of the surface and areas frequently used.
5.  Dip a clean brush into dark varnish or coffee paint. Remove the excess on a paper towel. Lightly brush the brush on the surface, leaving much of gold paint visible.
6.  Remove any excess varnish or paint from the surface. Allow to dry.

Tips & Warnings

  • Apply the gold paint in thin layers to avoid smudging.
  • Brush the coffee paint or varnish very slightly. If it is thick, consider thinning with paint solvent or water for a better result.
modern-bedroom

Determining Wall Shelf Placement

You can add decorative interest to the walls of any room in your house with shelves. They provide a space to display various items, from photos to collectibles. Wall shelves come in different sizes and colors, allowing you to customize a look for your home. When hanging wall shelves, consider the design to create a display that is not only visually appealing, but practical for the intended use.

Instructions

  1. Decide where you want to hang the shelves. Choose the wall you want them to be displayed and determine exactly where you want to place them: in the middle of the wall or to one side, for example.
  2. Determine how you want to organize the shelves. For example, you can hang them in a vertical column, a horizontal line, a diagonal line or in a square. Choose a decoration that will attract the eye and serve as the best way to showcase the items you want displayed on the shelves.
  3. If you’re hanging shelves above each other, measure the height of the tallest item you are trying to display and space the shelves accordingly. If you are placing the shelves in a horizontal row, decide how much space you want between each. For example, spacing them too far apart may make them look like random elements, while placing them too close can create a stacked look.
  4. Install wall shelves. Once you’ve decided on a design, hang the shelves. Make pencil marks on the wall to indicate exactly where you want to hang each shelf. If possible, hang them on the wall studs. If there are no studs along in the chosen area, use anchors to secure the shelves to the wall. Use a level to make sure the shelves are hung straight.
drain services baltimore

Eliminating Odors in Shower Drains

The bad odor emanating from a shower commonly comes from problems inside the pipes; however, this is not always the case. To effectively get rid of the bad odors coming from the shower drain, you must first determine the source of the odor.

Odor of pipes and fixtures

When trying to locate the source of the foul odor of a shower drain, begin with the drain and plumbing. Due to humidity and heat, shower pipes are prone to mold formation, which often appears in visible areas of the shower, such as in the shower head and the plug. Shower tubes are prone to a slime that is formed from the organic matter present in the shower, which is commonly present in the drainage area.

Drain Cleaning and Tube Top

Getting rid of a bad smell from the shower drain is a fairly simple process, although it can be a hand -intensive depending on where the pipes are that the smell is coming from. Begin cleaning the pipes by removing the drain plug and cleaning the plug with a soap and brush. Clean the drain and pipe just inside the leak by lathering with a soapy brush and scrubbing the inside of the drain and pipe. You should let the water run for about a minute to rinse the loose sludge down the drain.

Deeper cleaning in the pipe

When the odor does not subside after cleaning the drain plug, the inside of the manifold and the top of the shower tube, you should go deeper into the pipes. Rent a probe and push it into the drain. This will break up the slime that may have formed deep in the pipes. It also has the ability to hook clogs, breaking and pulling them from the pipes when needed.

Elimination of external odors

If you clean the drainage fittings, inside drain and use a probe deep in the pipes and the odor remains, the odor is not coming from the drain itself. Humidity can dissolve odor-causing substances and make the odor more prominent, which can occur when water runs, making you think that drainage is the source. So if the cleaning does not eliminate the smell, look for external sources. If you cannot find the source of the smell, you should call your local health department to make sure the smell is not coming from the sewers.

Home Decoration 1

Making Space for Clothes in an Apartment

Finding enough space for clothes in an apartment is sometimes difficult with little available space. This is particularly frustrating if more than one person lives in the apartment. Getting rid of excess clutter and using organizational tools is an effective way to create more space for clothes in your little home. Using all available space to store items is possible with a little creativity and the right kind of furniture.

Instructions

  1. Look through your belongings and discard those items that are broken, stained or need repairs. Donate clothes you do not like or that do not suit you. Get rid of the gadgets, electronics and other items that you do not use often enough to store them. Start with one drawer at a time, or room, and donate or discard everything that is not functional, does not have sentimental value or does not add beauty to your apartment.
  2. Install decorative wall hooks on a bedroom wall or any bare space; hang hats, bags, belts, jackets and coats.
  3. Wash and fold clothes that you will not use this season. Store in plastic tubs under the bed; some containers come with wheels for easier access. Use high and difficult to reach shelves for such garments as well. Once the season changes, take them out of storage and replace them with clothes you were wearing.
  4. Stack storage boxes with covers in your closet to use vertical space along the closet walls. These boxes are available in a variety of sizes to store everything from blankets and quilts to shoes. Label the boxes with adhesive labels or cards and tape. This allows you to detect with a glance what’s inside the containers. Place them so that the containers with frequently used items are at the top. Another idea is to install shelves that allow you to use the space more wisely.
  5. Buy multipurpose furniture with hidden storage or a cedar chest for storing bulky items and provide additional seating. End tables and Coffee tables with hidden storage offer more vertical storage space than just a desk or table.
  6. Invest in a rack, available in discount stores or home stores and put it behind a wall to hide clothing.
  7. Add an extra closet rod in your closet. This doubles the hanging space and helps organize your closet area. Hang shirts, sweaters and jackets on the top shelf, and hang skirts and pants on the bar below.

Tips & Warnings

  • Place a tablecloth on an unsightly storage box to transform it quickly into a table. This gives you a place to store seasonal clothes for sports or other events that you rarely use, but you do not want to let go.
interior-renovation-5

How to Make Dark Stained Wood Lighter

If you try to apply a light-colored stain on top of an existing dark finish, you will not notice much difference. To completely alter the color of the wood’s finish, remove the existing paint using an oil based solvent. Once you have removed the original finish from the wood, you can add a lighter color stain. Liquid coatings are well suited for softwoods, but tend to dry unevenly on most hardwoods. For a light finish that’s uniform, choose a specific type of paint that look beautiful on both soft and hard woods.

Instructions

  1. Wear a mask and protective gloves. Remove the polyurethane finish by sanding the with an electric sander equipped with grain 50 sandpaper. Be sure to move the sander along the grain of the wood otherwise the results could cause be damage to the wood. Go over the wood again with 100 grain sandpaper.
  2. Clean sawdust from wood using gauze.
  3. Lighten dark wood by wiping it with a solvent, using a nylon pad. Stop once the wood is clear. Wait an hour for the solvent to evaporate.
  4. Applying a clear gel paint using a brush made for wood. Immediately clean the wood gel using rags.
  5. Brush the gel paint using mineral spirits. Let the paint dry for four hours.
  6. Apply a layer of polyurethane sealant using a natural brush. Move the brush with the grain of the wood. Let the sealer dry for two hours.

Tips & Warnings

  • Always use a mask when working with solvents or gases as the fumes can be very overwhelming. Similarly, use rubber gloves so you don’t suffer rashes or burns.
mold-remediation-2

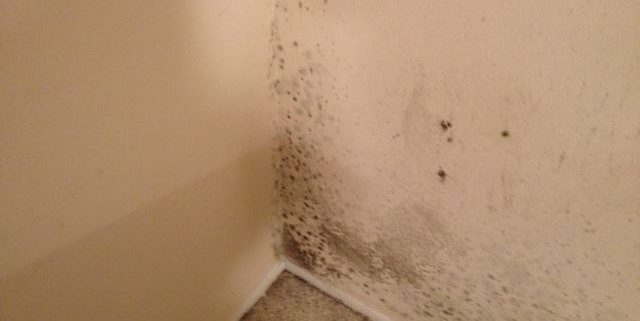
Avoiding Mold After Water Damage

Mold can be a health risk, especially to people with allergies or asthma. People with weak immune systems or chronic lung problems may be susceptible to mold infections. After a flood or leak mold can grow rapidly.

Instructions

Mold prevention

  1. Open windows and doors to help dry the wet areas. Set up fans to circulate the air to help dry the areas more quickly.
  2. Wash any wet items well with detergent and clean water. Items must be washed within 24 hours of getting wet. Any porous items that cannot be cleaned and dried completely, such as furniture, should be removed. Carpet, carpet padding and drywall that have become wet should also be removed
  3. Wipe down hard surfaces with a mixture of bleach and water. Use no more than 1 cup of bleach in 1 gallon of water. Be sure to wear protective goggles and non-porous gloves. Use a hard brush to scrub areas clean.

Tips & Warnings

  • Discoloring of walls and ceilings or a moldy odor are indications of possible water and mold damage.
  • Never mix bleach with other cleaning products as the result can produce toxic fumes.
Handyman On Call testimonials

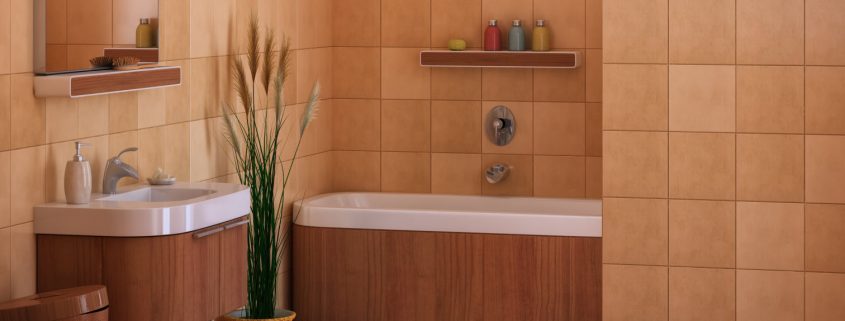
How to Paint Over Existing Tiles

When you’re ready to remodel your bathroom, if you need to save money, you do not have to remove the old tiles. With the right tools and a good foundation of knowledge, you can paint over them. Below are a few good tips that will help you paint over the existing tiles.

Instructions

Selecting paint and supplies

  1. Compare different types of paint suggested for tiles or ceramic tiles and the recommendation on how to apply them.
  2. If it’s needed, choose the correct primer; many types of latex paint require a primer base. An oil-based paint may not need a primer coat. Be sure to read the manufacturer’s instructions. One of the best types of enamel paint for tiles is the epoxy-type; It is tough and durable and you can buy it in aerosol cans.
  3. Buy the paint and the tools needed; do not forget to get painter’s tape, rags, gloves and mask. Decide whether you will use spray cans or a spray gun or if you’re just going to use foam paint brushes and rollers.

Surface preparation

  1. Clean the bathroom tiles with a mixture of vinegar and ammonia to remove accumulated soap debris. Rinse thoroughly and allowe to dry. Repeat the cleaning and rinsing if the tiles have lots of soap scum. For difficult residues, you can buy disodium phosphate in a paint shop but be sure to follow the manufacturer’s instructions carefully.
  2. Sand the tiles slightly, just enough to make it slightly rough. This will help the primer and paint adhere to the tile. Vacuum and clean to remove excess dust from sanding.
  3. Fill the joints with caulk around the tub and clean if necessary.
  4. Remove any fixture that may be screwed into the tiles; Remove the shower head and faucet handles, if possible. If you cannot remove them, cover them well with a plastic bag.
  5. Protect the surrounding area with masking tape; be especially careful to protect the surrounding walls and any recessed areas.

Painting tiles

  1. Primer the borders along the edges where the tiles meet the wall and ceiling. Also do around appliances. Use at least two coats of primer for the borders.
  2. Spray the tile with the can of spray paint or spray gun. Practice spraying a piece of cardboard first. The secret is to start spraying paint an inch or 2 (2.5 to 5 cm) before it hits the tile, and finish spraying an inch or 2 (2.5 to 5 cm) beyond the tile. Paints with gentle movements, using several light coats; Do not use too much paint or it will run.
  3. Use a disposable foam roller if you’re going to paint by hand. The foam tends to leave very few marks and a roller is better than a brush. If you need to use a brush for small areas, you use a foam brush otherwise you’ll get streaks.
  4. Follow the manufacturer’s instructions for drying time between coats. When you have finished painting, do not use the shower or bath for at least 48 hours, depending on the humidity in your home.
remodeling-2

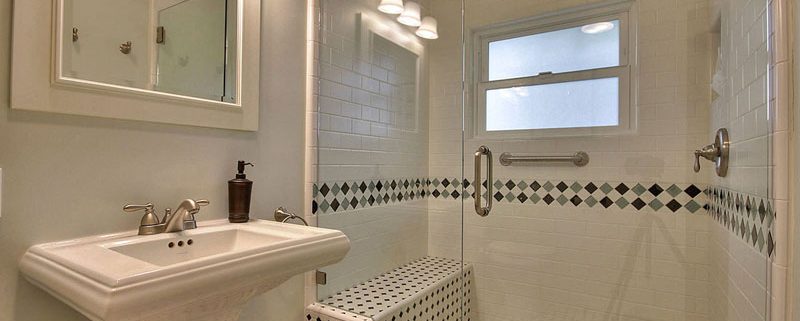
Designing a Wheelchair Accessible Bathroom

There are universal guidelines that must be followed when designing a bathroom with access for the disabled. These guidelines suggest the height of the toilets, sinks, showers, switches and the amount of space it takes to maneuver a wheelchair in the space. The Americans with Disabilities Act of 1990 can be found at www.access-board.gov. Many products are available to create a handicapped bathroom that’s stylish and functional.

Instructions

  1. Make a list of your needs and desires. Check magazines and cut out pictures of products you want to include in the bathroom. Visit websites that offer wheelchair accessible products. Choose products you want to use in your bathroom and print their images and information.
  2. Create a folder to store your ideas and images. Use tabs to separate the types of products such as shower, vanity unit, floor, toilet and accessories. Put the pictures and product information print-outs in the folder.
  3. Draw a plan of the bathroom on graph paper. Draw the location of the bathtub or shower, toilet, sink and vanity. Keep a minimum open floor space of 30 by 48 inches to accommodate a wheelchair. A wheelchair will need a space of at least 60 inches in diameter to make a 360 degree turn. This allows sufficient space to maneuver the wheelchair with freedom in the bathroom.
  4. Plan a space for a door that is at least 32 inches wide, but preferably 36 inches. Choose a sliding or pocket door to allow more space in the bathroom.
  5. Design the sink so the bottom is open to allow the wheelchair to fit under it. Leave 30 to 34 inches of clearance under the sink. Put bars for towels to a “reachable distance” to someone sitting.
  6. Plan your bathtub or shower so you’d be able to enter on foot. Design a shower seat or leave room for you to use a wheelchair in the shower.
  7. Use mirrors designed to tilt, so that you can see while seated.

Tips & Warnings

  • Follow the guidelines set forth by the Americans with Disabilities Act of 1990.
  • Plan to reinforce wooden walls to install handrails.
  • Make everything achievable while sitting.
  • Plan for a toilet about 18 inches tall.
  • Select lever-style door handles.
duct-cleaning-1

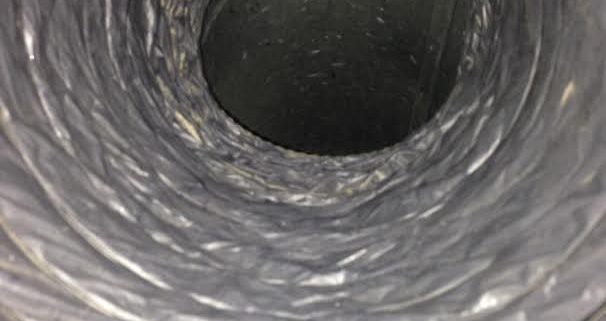
Cleaning Your Dryer Duct

Sometimes the lint tube of your dryer can get stuck with your clothes and when this happens, the flow of air from your dryer is blocked and can cause long drying times, incomplete cycles, automatic sensor failures and even fires. Because of this, it is important to keep your dryer duct clean to avoid problems. You can hire a professional to clean it for you, but this can be expensive. If you want to save money, you can clean the ducts yourself using little time and energy.

Instructions

  1. Unhook your dryer duct from the wall and dryer. Sometimes, they are joined by a connector that can be squeezed to release.
  2. Remove the detachable part of the duct that is easier to clean. Using the wand of your vacuum, Insert the wand into the inside of your duct. You can also use a brush to fluff, if you prefer.
  3. Suck through the tube, which connects to the wall vent and the dryer
  4. Turn the hoses of the dryer, forcing the lint out of the duct and out through the vent.
  5. Reattach the tube to the dryer and the wall.
  6. Repeat this cleaning every one to three months

Tips & Warnings

  • Use your vacuum’s wand to vacuum any lint that has accumulated in the dryer or in other areas that you can easily access. This will also help prevent problems with the dryer.
  • For particularly dirty or clogged ducts, consider replacing the tube with a new one. These can be purchased at your local home improvement store and are quite cheap. Depending on the material you choose, the cost will vary.
  • Once every one to three years, hire a professional to clean your dryer and air ducts completely to make sure you’re safe.