living room interior

Stone Fireplaces Styles

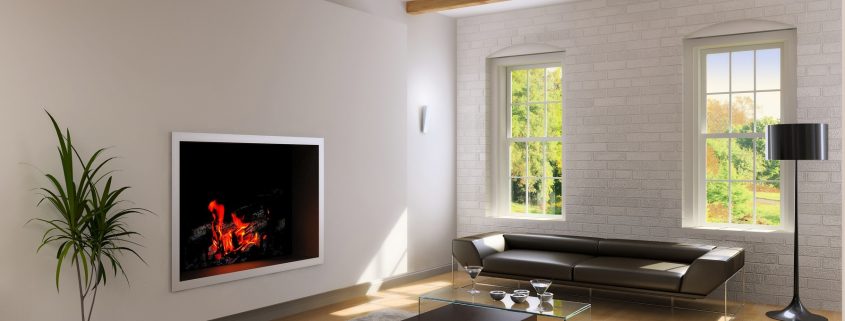
Often a fireplace is the centerpiece of a living room, no matter the size, and can be made in any shape, size, style and material. In addition, a fireplace, especially those made of stone, can be more than just a decorative part of the house; It can be the crucial part for a fire.

Fireplace finished in faux stone

This type of fireplace is very simple to install. Stone finishing is a composite material made of cement, sand and colorants, and applied in construction on to an existing faux stone. People often have trouble recognizing actual stone versus faux stone. The stone finish is less expensive than real stone and weighs much less, which means it can be installed without the necessary foundations to install real stone. Also, it can be applied to both brick and metal chimneys. These materials are 50 to 60 percent less expensive than the materials needed for the installation of real stone.

Cultured stone

Cultured stone is light, a manmade product and used mainly for decorative purposes. Made of concrete and different pigments it’s usually formed into molds shaped like natural rock. The lightweight nature of the material provides less stress to the structure of the foundation and can be installed without a brick base to support it. But unlike the stone finish, it is more expensive and not always universal in color. If cultured stone needs to be cut for installation, the inside will probably have the color of gray cement.
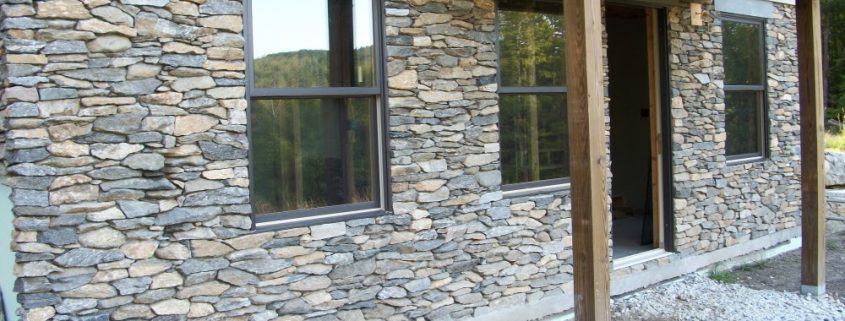
Natural stone

Natural stone fireplaces are often built using a method of masonry. The stone is often largely uncut from its original state in the quarry; the only difference is that the stones are cut into manageable sizes. Natural stone fireplaces are more durable than their counterparts of bricks which splinter, flake and crack over time. Types of natural stone used for the fireplaces include common stone, river stone and flagstone.
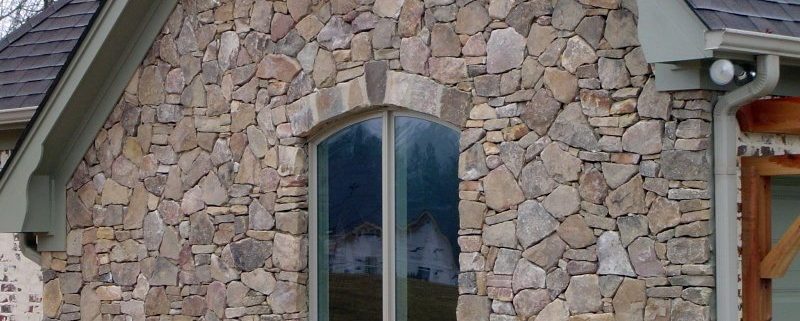
Dry stacked stone

The method of using stacked stones for fireplaces is a design that requires greater skill in construction. Much depends on the weight of the stones to maintain the shape of the fireplace without using cement in visible areas. Cement is commonly used to reinforce and seal the crucial areas of the structure of a fireplace but is well hidden unless you look closely.

masonry-4

Making Your Masonry Fireplace More Efficient

A masonry fireplace creates a warm and welcoming atmosphere anywhere. However, fireplaces are a source of significant heat loss, even when in use. Although the room will feel the heat being given off, the burning process pulls hot air out of the house. There are many ways to improve the efficiency of a fireplace, reduce heat loss from the house and use the existing masonry fireplace as the most effective source of heat.

Instructions

  1. Install a fire back, which is a thick sheet metal, such as cast iron, to help control the heat and radiate it back into the room. The fire back is placed in the back of the masonry chimney and fixed with masonry screws.
  2. Place a rack with a fan on the floor of the chimney fan. The fan will push the cool ambient air, heat it in the rack and blow warm air into the room. Put the fan in place and plug it into an outlet.
  3. Insert an inflatable pillow in the fireplace at the base of it when not in use. This prevents the heated air from another source, such as a furnace, from going to the fireplace. Be sure to remove the pillow from the chimney before starting a fire. Press the fireplace pad in place.
  4. Install tight fitting fire doors to seal the circulation and not lose the air in the room from the fireplace. Use them during operation, as when not. Attach them to the fireplace opening with masonry screws.
  5. Place a chimney fan on top of the chimney to help the fire burn hotter. Remove the chimney cap and put the fan in place. Secure it with screws to the masonry fireplace. Replace the cap on the chimney fan to prevent water and birds from entering the chimney.
  6. Install a vent from the outside of the chimney’s combustion chamber to extract the cold outside air for combustion instead of air heated from the inside. Pierce through the masonry with masonry hole saw from inside the combustion chamber. Insert the vent through the opening.
masonry-9

Making Your Masonry Fireplace More Efficient

A masonry fireplace creates a warm and welcoming atmosphere anywhere. However, fireplaces are a source of significant heat loss, even when in use. Although the room will feel the heat being given off, the burning process pulls hot air out of the house. There are many ways to improve the efficiency of a fireplace, reduce heat loss from the house and use the existing masonry fireplace as the most effective source of heat.

Instructions

  1. Install a fire back, which is a thick sheet metal, such as cast iron, to help control the heat and radiate it back into the room. The fire back is placed in the back of the masonry chimney and fixed with masonry screws.
  2. Place a rack with a fan on the floor of the chimney fan. The fan will push the cool ambient air, heat it in the rack and blow warm air into the room. Put the fan in place and plug it into an outlet.
  3. Insert an inflatable pillow in the fireplace at the base of it when not in use. This prevents the heated air from another source, such as a furnace, from going to the fireplace. Be sure to remove the pillow from the chimney before starting a fire. Press the fireplace pad in place.
  4. Install tight fitting fire doors to seal the circulation and not lose the air in the room from the fireplace. Use them during operation, as when not. Attach them to the fireplace opening with masonry screws.
  5. Place a chimney fan on top of the chimney to help the fire burn hotter. Remove the chimney cap and put the fan in place. Secure it with screws to the masonry fireplace. Replace the cap on the chimney fan to prevent water and birds from entering the chimney.
  6. Install a vent from the outside of the chimney’s combustion chamber to extract the cold outside air for combustion instead of air heated from the inside. Pierce through the masonry with masonry hole saw from inside the combustion chamber. Insert the vent through the opening.
fences-4

DIY Wooden Fence Installation

Installing a fence is a good way to prevent pets from escaping the garden and have a safe area where children can play. A privacy fence will increase the value of your property and provide further security. Within days, any man skilled in “do it yourself” projects can install a wooden privacy fence along the perimeter of the garden.

Instructions

  1. Consult with utility companies and requests them to mark underground wiring and pipes around your property. This allows you to visualize the place where the supply lines are so you do not bump into them when making the holes for the posts.
  2. Place a wooden post at each corner of the fence. Hold a tight rope stretched between these poles. With a tape measure, mark the location of the posts which should be spaced 8 feet (2.4 m) on center.
  3. With the rope stretched between the poles, insert a stake at every mark.
  4. Rent a gas driller to make holes in the ground that correspond to the posts at a depth of 36 inches (90 cm).
  5. Place a pressure-treated 4 x 4 x 8 feet (1.2 x 1.2 x 2.4 m) on each corner post. Pouring cement into the post hole. Tamp the cement once you consider that the post is straight and plumb and add water around the post; the concrete will absorb it and the pole will be installed. Use a level of 4 ft. (1.2 m) to make sure the post is vertical.
  6. Tie a string between the outside of each post. This will provide a guideline for placing the remaining poles and ensure proper installation of the fence.
  7. Set three boards of 2 x 4 x 8 (0.6 x 1.2 x 2.4 m) between the posts. Place a 9 inch (22 cm) from the floor and another on top, added another in the center of both boards. Use a level to ensure that they are level and screw them to the posts 4 x 4 ft. (1.2 x 1.2 m). For this step you’ll need an electric screwdriver and 3 (7.5 cm) outdoor inch wood screws.
  8. Install a stake in each corner of the fence. Place a screw on top of all the pins. Stretch a string tightly between the screws. This will serve as a guide to determine the height of the stakes.
  9. Screw the stakes tables 2 x 4 feet (0.6 x 1.2 m) with two 2 inch (5 cm) outdoor wood screws per table. Set ¾ inch (2 cm) screws to prevent lateral slipping. Leave a gap of 1/8 inch (0.3 cm) between the stakes to allow for expansion and contraction. If necessary, cut the stakes to the desired height with a miter saw.
  10. Check that the wooden stakes are plumb by using a carpenter 4 foot (1.2 m) level.

Tips & Warnings

  • Apply a finish to good quality exterior wood to protect the fence. This will provide greater duration.
  • Use safety goggles when using power tools.
master-suite-1

Designer Suggestions for Painting Small Bedrooms

Small bedrooms can feel cozy and comfortable when they are decorated with its size in mind. To help a small bedroom look brighter, use light cool colors and choose decorations, bedding and furniture with little contrast. Make sure the furniture is scaled correctly with the room, opting for smaller furniture and choose only furniture that’s needed.

Tone

Cool colors visually recede, while warm colors advance. To the eye, where a wall looks back, looks away, therefore, the room looks bigger. Cool colors reflect light, while warm colors absorb it. Use these tricks, using cool colors on the walls to bounce the light around, such as blue, green or cool white. Avoid warm colors like red, orange or yellow to make the walls seem farther apart and to make the room appear larger.

Saturation

Lighter and less saturated colors reflect natural light, and the more light that bounces around the room, the brighter and bigger it seems. If you choose a dark color like deep red or dark brown, light is absorbed by the paint colors, which makes it look like the walls recede.

Ceilings

Do not forget the ceiling when you’re thinking about the color of the paint. Lighter colors make the ceiling brighter and seem to be higher, while dark colors make the ceiling feel closer and can make you feel a little claustrophobic. Choose white, cream or light blue for your ceiling to help make the room appear larger.

Brightness

Consider the gloss paint you choose. Most indoor paints are available in a variety of highlights, from flat to high. High gloss paints help bounce light around the room, while the flat paint makes the walls look less bright. However, flat paint doesn’t hide flaws on the walls, so if your room has walls with imperfections, choose a gloss level. Many bedrooms are painted with an eggshell finish, so if the walls are in relatively good condition, choose a semi-gloss or satin.

painting-6

Designer Suggestions for Painting Small Bedrooms

Small bedrooms can feel cozy and comfortable when they are decorated with its size in mind. To help a small bedroom look brighter, use light cool colors and choose decorations, bedding and furniture with little contrast. Make sure the furniture is scaled correctly with the room, opting for smaller furniture and choose only furniture that’s needed.

Tone

Cool colors visually recede, while warm colors advance. To the eye, where a wall looks back, looks away, therefore, the room looks bigger. Cool colors reflect light, while warm colors absorb it. Use these tricks, using cool colors on the walls to bounce the light around, such as blue, green or cool white. Avoid warm colors like red, orange or yellow to make the walls seem farther apart and to make the room appear larger.

Saturation

Lighter and less saturated colors reflect natural light, and the more light that bounces around the room, the brighter and bigger it seems. If you choose a dark color like deep red or dark brown, light is absorbed by the paint colors, which makes it look like the walls recede.

Ceilings

Do not forget the ceiling when you’re thinking about the color of the paint. Lighter colors make the ceiling brighter and seem to be higher, while dark colors make the ceiling feel closer and can make you feel a little claustrophobic. Choose white, cream or light blue for your ceiling to help make the room appear larger.

Brightness

Consider the gloss paint you choose. Most indoor paints are available in a variety of highlights, from flat to high. High gloss paints help bounce light around the room, while the flat paint makes the walls look less bright. However, flat paint doesn’t hide flaws on the walls, so if your room has walls with imperfections, choose a gloss level. Many bedrooms are painted with an eggshell finish, so if the walls are in relatively good condition, choose a semi-gloss or satin.

masonry-1

How to build a wooden roof frame

Frames come in a variety of different shapes and sizes depending on the type of construction of the roof. The types of frames that can be assembled are gable roof, sloping ceilings, vaulted or attic. A residential roof frame can be between 4.5 and 15 m. The size of a frame depends on the length and height, or magnitude of the roof inclination and flown addition if necessary. Due to new technologies and ease of assembly and use, most new homes are built with frames.

Instructions

  1. Find a large open area outside to lie the roof frame as its being constructed. When completed, it will tilt up to be secured on the roof.
  2. Prepare a table saw. Most 2”x4” wood frames will have to be cut to size. Measure and mark the wood and cut it off all at once to have it ready for construction.
  3. Place a piece of wood of 3.80 cm x 10 cm x 7.31 m as the lower strap of your frame. Make a triangle with two pieces of 5.48 m x 3.8 x 10 cm and join them at the top end, protruding 15 cm above the lower edges of the lower strap.
  4. Set the upper straps in the tip with a triangular metal reinforcement and fix the lower ends of the upper to the lower strut with triangular metal reinforcements. Use small nails to fix the reinforcements to the wood.
  5. Prepare two substrates 2.13 m x 8 x 10 cm long and affix between the upper and lower straps for support. Connect the upper ends of the two supports to the tip using nails. Join the lower ends of the two supports dividing the lower leg into thirds. Use triangular reinforcements to secure the brackets to the bottom tie.
  6. Cut two more supports both 91 cm long. Place the bottom of these supports, the same triangular reinforcement of the lower strut to the longer supports, and attach them to the center of the upper straps, one on each side.
siding-2

Cleaning your dryer ducts

The pipe your dryer lint gets sucked into can sometimes get stuck with your clothes. When this occurs, the flow of air from your dryer is blocked and can cause long drying times, incomplete cycles keeping your clothes wet, failures of automatic sensors and even fires. Because of this, it is important to keep your dryer duct clean to avoid problems. You can hire a professional to clean it for you, but this is can become expensive. If you want to save money, you can clean the ducts yourself using little time and energy.

Instructions

  1. Unplug your dryer and detach the duct from the wall. Sometimes, they are joined by a connector that can be squeezed to release.
  2. Remove the detachable part of the duct so it’s easier to clean. Insert the wand tool of your vacuum cleaner to suck inside your duct. You can also use a brush if you prefer.
  3. Also vacuum the tube, which connects the vent from the dryer to the wall.
  4. Put the pieces of your dryer back together and connect the duct back to the wall from the dryer
  5. Repeated cleanings every one to three months

Tips & Warnings

  • Use your vacuum and your crevice tool to vacuum any accumulated lint trapped in the dryer or in other areas that you can’t easily access. This will also help prevent problems with the dryer.
  • The detachable part of the dryer ducts should appear to be covered with vinyl or sheet metal.
  • For particularly dirty or clogged ducts, consider replacing the pipe with a new one. These can be purchased at your local home improvement store and are quite cheap. Depending on the material you choose, the cost will vary.
  • Once every one to three years, hire a professional to clean your dryer completely and breathing system to keep you safe.
fences-9

Building a chain link fence

If you are looking for a quick and durable method for enclosing a portion of your yard, try installing a chain link fence. The wire mesh is less insulating compared to vinyl fence or wood, so you can use wire fences to separate areas for pets or children to play. Short wire fences are also used in areas of high traffic to prevent people to walk through the gardens of a house.

Instructions

  1. Mark the two ends of the segment to surround with stakes. Attach thread to the stakes that extends from one end to the other to create a reference point that you can use when you insert the rest of the stakes.
  2. Measure the length of the rails using a tape measure. Use this measurement and mark it with stakes in order to place the rest of the posts for the fence. Make a hole in each place where there is a stake using a shovel or post excavator. The holes should be at least 1/3 the length of your fence posts. Add a few extra inches and add some gravel in the bottom of the hole for drainage.
  3. A bag of concrete mix is needed for each hole and follow the package directions to prepare it. The two end posts are wider than the rest of the posts, so you should make sure you are installing them correctly. Ask an assistant to hold the post in place while you add the concrete into the hole around it. Repeat this step to install the remaining nearby poles.
  4. Place a tension and clamp on each of the end posts. The tension should be placed about 10 inches below the top of the pole and the clamp should be two inches above this.
  5. Connect one end of the top rail of the fence to the clamp at the first end post. Slide the rail through the frames that are above the middle of the poles. Connect the free end of the top rail with the clamp at the other end post.
  6. Move to one end of the fence and tie the edge of the wire mesh on the tension using a bolt. Tighten the bolt with a wrench. Unroll the mesh along the fence line. Stretch it as tight as possible so there are no bulges. Use a wire tie for every two feet of wire to secure the mesh to the top rail. When you reach the end of the fence, cut the wire mesh with mesh pliers and connect it with the tension that is at the end post. Use the wrench to tighten the bolt.

Tips & Warnings

  • Check with the utility company in your city to ensure that no underground pipes are located where you want to dig post holes for your fence. See if you need to apply for a building permit.
  • Use safety gloves to protect your hands from sharp edges of the wire mesh.